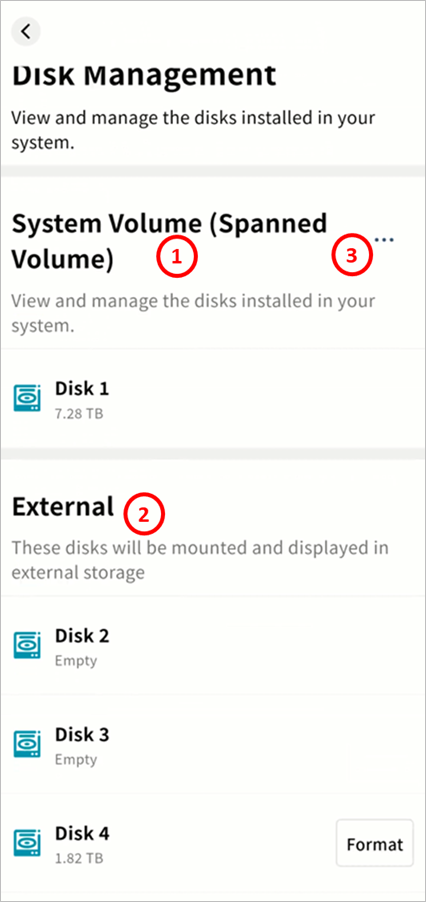
Disk Management
In Disk Management, you can view all hard drives currently inserted in the Weline Pro edge device and configure them accordingly.
① System Volume: Configure the system volume, format disks, and view the format type and capacity of each disk included in the system volume.
② External Disks: Newly connected hard drives not yet part of the system volume will appear here. After formatting, they can be used as external storage.
③ Format and Rebuild System Volume: Reformat all or selected hard drives into a new disk configuration.
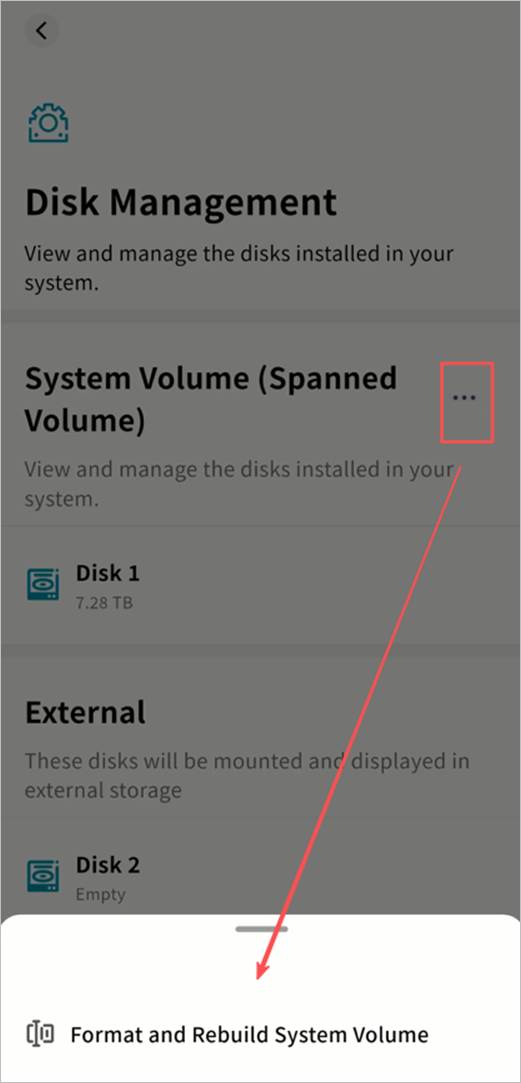
Format and Rebuild System Volume
If you install or replace hard drives and do not want to use them as external storage, select Format and Rebuild System Volume.
Steps:
- Go to SET UP > Disk Management and click Format and Rebuild System Volume.
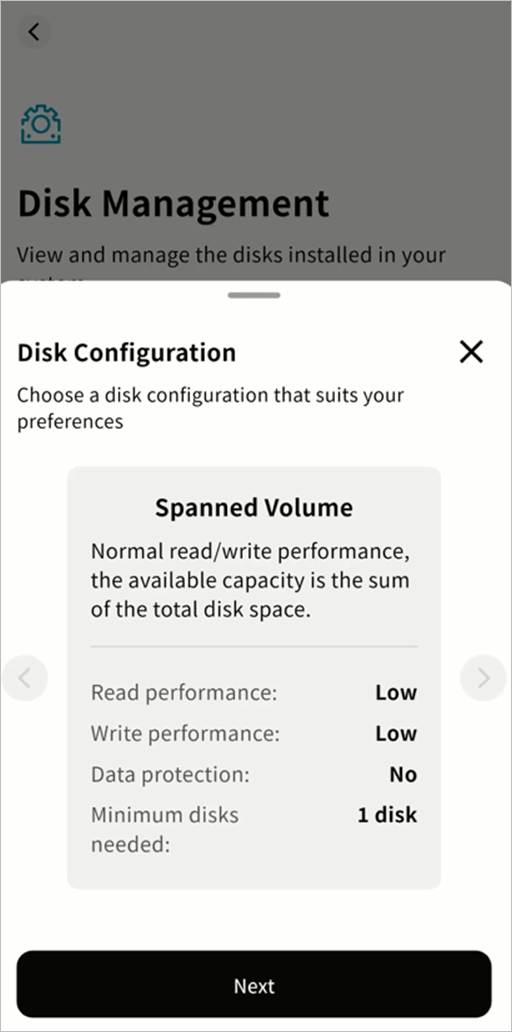
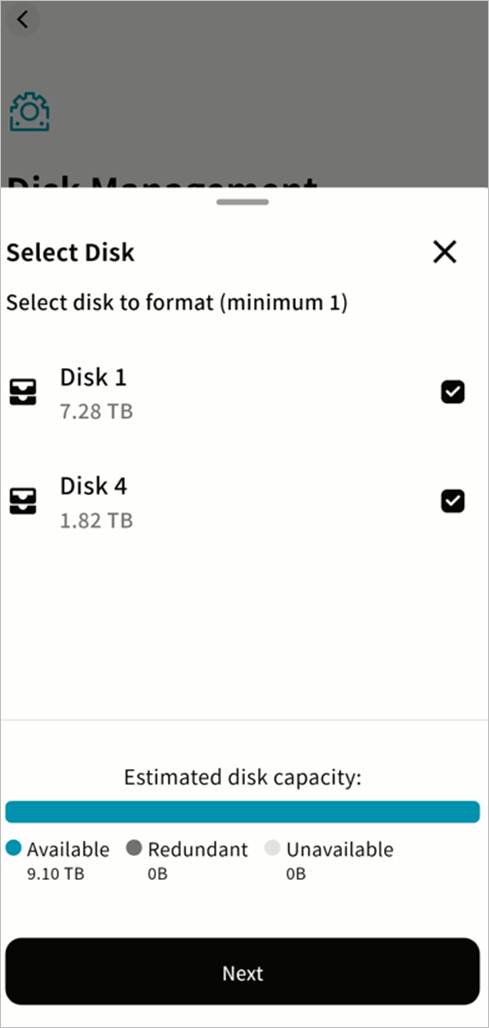
- In the pop-up window, choose a new disk format. Weline Pro supports multiple disk formats:
- Normal Mode: Basic mode. Total usable space equals the sum of all disks, no redundancy.
- RAID 0: Optimized read/write performance. Usable space equals the sum of all disks, no redundancy.
- RAID 1: Requires two disks. Usable space equals the smaller of the two disks, with redundancy.
- RAID 5: Requires at least three disks. Usable space equals the combined capacity of two data disks, with redundancy.
- RAID 10: Requires at least four disks. Usable space equals the smaller group’s total capacity, with redundancy.
The interface will display the estimated available capacity for the selected configuration.
- After selecting the format, choose the hard drives to include in the system volume.
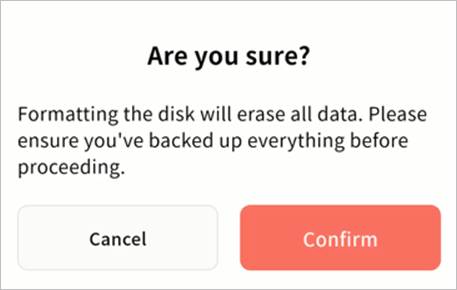
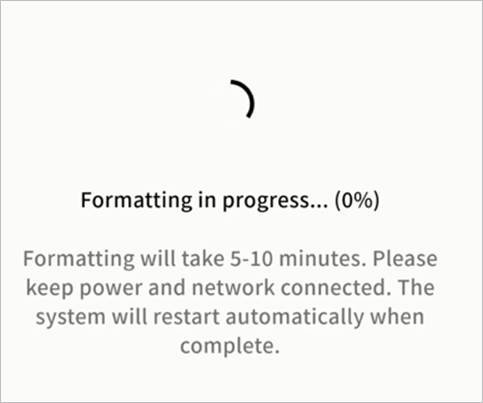
- Click Confirm to begin formatting. Please wait until the process completes.
- In RAID modes, after formatting you may see the disk status as Synchronizing. This is an internal process and will not prevent you from uploading, downloading, or managing files.
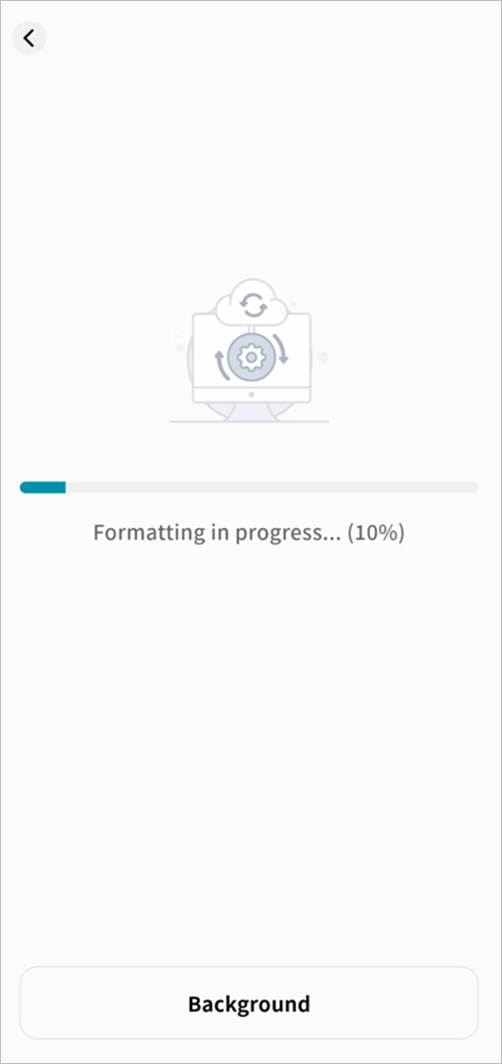
- During formatting, you can return to the device page to view the progress.

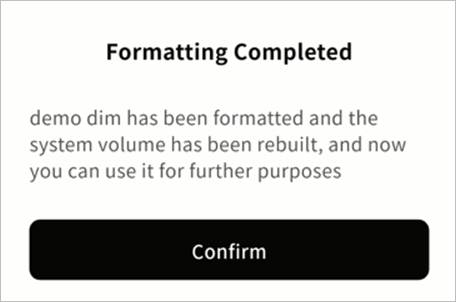
- Once formatting is complete, a notification will appear. Click Confirm to start using your Weline Pro device.
Add External Disk
If you insert a new hard drive and do not want to rebuild the system volume (which would erase existing data), you can configure it as an external disk.
Steps:
- Go to SET UP > Disk Management. Newly inserted drives will appear as Pending Configuration.
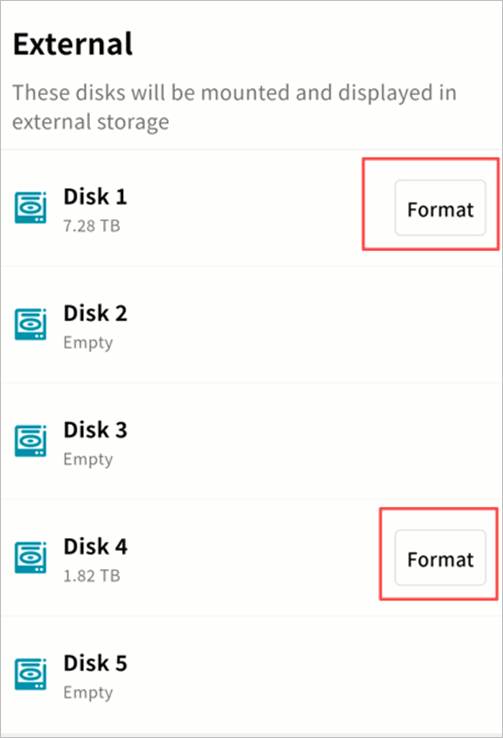
- On the pending disk, click Format. In the pop-up window, click Confirm.
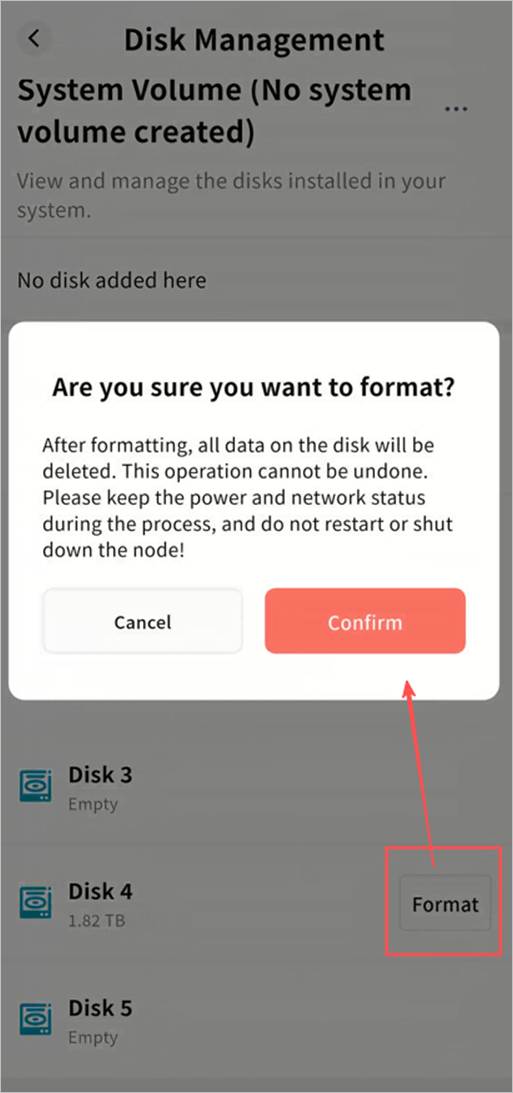
- The system will begin formatting. You can click the Back button to close the progress window.
- Once formatting is complete, you will see a success notification and the Pending Configuration status will be removed.
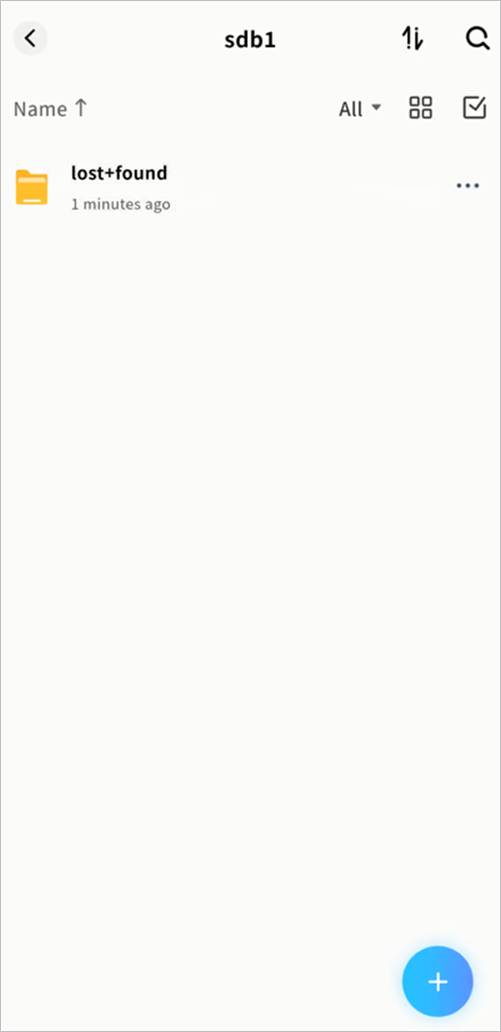
- Go to System Apps > External Storage to view the newly added external disk.

- Double-click the disk name to access it and perform file operations.Note: Do not delete the “lost+found” folder to avoid unexpected issues.